Chapter 3
One thread through the machine
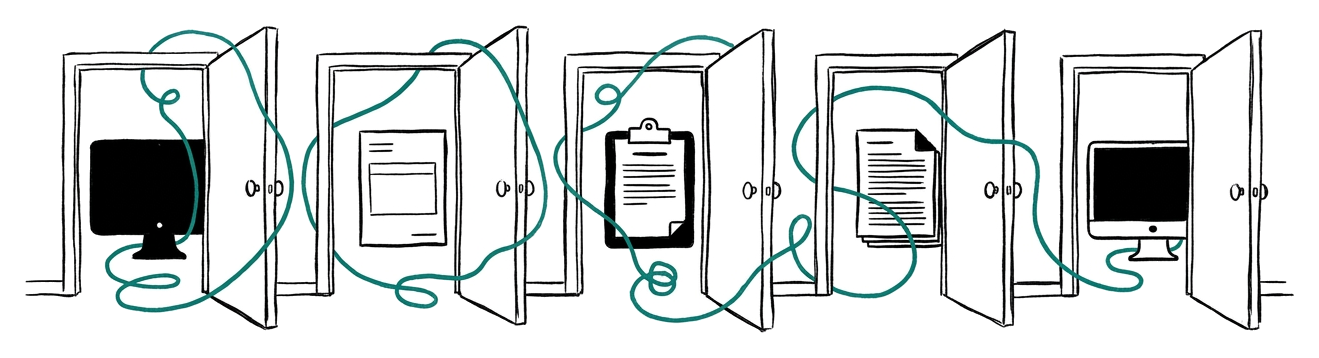
Sam clicks through the portal on his lunch break. The LNA lives in one place. The evidence lives in another. The narrative in a third, the checklist in a fourth.
Each screen looks complete on its own and says nothing about the others, and that is exactly what applicants tell us: the information is scattered, and nowhere shows how it connects. This chapter is the fix. We will follow one piece of evidence through every screen it touches, and then lay the whole flow out in one table you can keep.
- a one-glance map of every portal screen and the information flowing between them;
- followed one evidence item end to end, from upload to checklist;
- a crosswalk table showing what each screen collects and where that information reappears;
- started your own join document, the one thing the portal does not keep for you.
Why the portal feels scattered
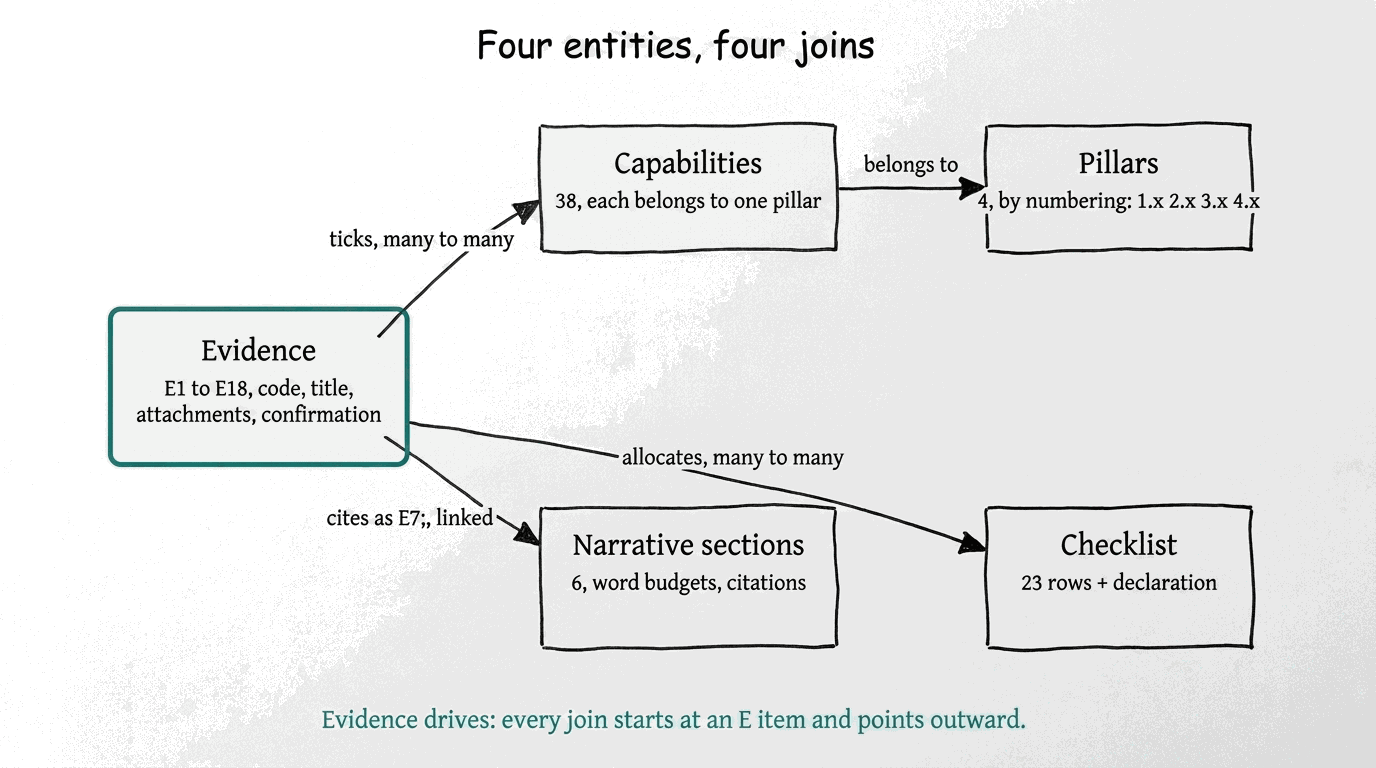
Every portal screen is built around one task: the LNA screens run the learning needs analysis, the evidence screens hold your records, the application screens hold the narrative, the checklist screens run the final checks. That is sensible engineering and terrible orientation, because your information does not live in one task. One evidence record is created on the evidence form, read by the capability grid, cited in the narrative, listed in the evidence list, allocated to the checklist, and possibly sent for peer review. Six screens, one record, and no screen shows the other five.
The four entities, joined
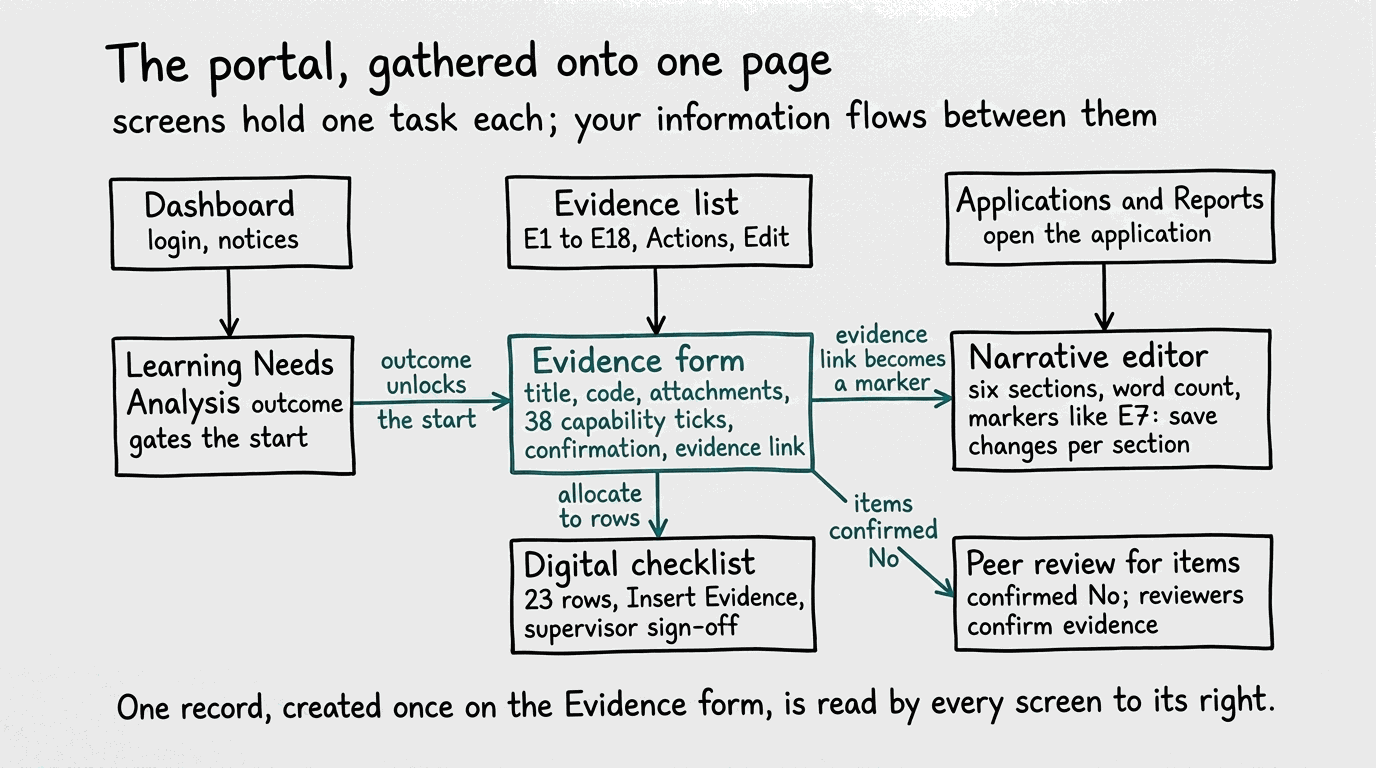
Chapter 1 named the four objects. Here is how they join. Evidence ticks capabilities, many to many. Capabilities belong to pillars, fixed by their numbering, so a tick on 1.6 is automatically a contribution to Clinical Practice and a tick on 4.2 to Research.
Evidence also appears in the narrative as hyperlinked markers, and it is allocated to checklist rows. The arrows all point outward from the evidence items, which is why the inventory comes first in everything that follows.
One thread: the journey of E7
Follow one synthetic item, a quality improvement project, through the whole machine. Nothing about it is special; that is the point. Every item you own will make the same journey.
- Born on the evidence form. Sam creates the record and gives it its permanent name: E7: QI: Sepsis screening improvement project. He uploads one redacted PDF, writes a short description, and saves. The portal gives the record a link. That link is about to matter everywhere.
- Ticked against capabilities. On the same form, Sam ticks capability 1.6 (synthesising sources for clinical reasoning) and 1.7 (initiating and modifying interventions), both Clinical Practice, and capability 4.2 (evaluating practice and acting on findings) in Research. Selection is a claim, not a verdict; the supervisor conversation comes later.
- Placed in the pillar plan. Because of those ticks, E7 counts toward Clinical Practice as a Core item and toward Research as a Supporting item. Sam's plan does not use it for Leadership and Management or for Education, and that is fine; not every item serves every pillar.
- Cited in the narrative. In the Clinical Practice section, Sam writes about the screening change and ends the paragraph with the marker E7:, hyperlinked to the record's portal URL. The marker number and code must match the record exactly.
- Listed once. The Evidence List at the end of the narrative gets exactly one entry for E7, with the same link. One record, one list entry, however often the prose cites it.
- Allocated to the checklist. On the checklist screen, Sam uses Insert Evidence to allocate E7 to the row Audit, service improvement, practice development or quality improvement evidence. The same document now satisfies a submission requirement.
- Confirmed. The record's confirmation radio says Yes: the QI report was externally verified, so no peer review is needed. Had it said No, E7 would have gone to peer reviewers, which is a normal route, not a failure.
One document, three jobs at least: it carries capabilities into two pillars, it anchors a paragraph of prose, and it closes a checklist row. Most of portfolio strategy is choosing items that travel well, and this journey is the test.
The crosswalk: what each screen collects, and where it reappears
| Portal screen | What it collects | Where that information reappears |
|---|---|---|
| LNA pages | Your learning needs analysis, supervisor review, recorded outcome, your acknowledgement | It gates the start: the application opens properly once the outcome is acknowledged, and the development plan shapes what evidence you will gather |
| Evidence list | The register of your records, E1 upward, with Actions and Edit | The source of every citation and allocation; its titles are the names the whole portfolio references |
| Evidence form | Title, code, description, attachments, the 38 capability ticks, the confirmation choice, and the record's link | Everywhere: the ticks feed the pillar story, the link becomes the narrative marker's target, the record feeds checklist rows and peer review |
| Applications and Reports | The entry point to your ePortfolio supported route application | Opens the narrative editor and the sections the verifier reads |
| Narrative editor | Six sections of prose with a live word count; markers such as E7: with hyperlinks; saved per section | The thing being verified; its markers must resolve to evidence records and its Evidence List must reconcile with them |
| Digital checklist | Twenty-three requirements with evidence allocated via Insert Evidence, plus supervisor sign-off | The final gate before declaration; its allocations point straight back at evidence records |
| Peer review | Reviewers' confirmation for records whose confirmation choice was No | Feeds back into the evidence record's status; completion is checked separately from the No choice itself |
- The mistake. Working through the portal in menu order, top to bottom, treating each screen as its own job.
- What goes wrong. You complete screens that later screens silently disagree with. Titles get set before you know what the narrative needs to cite. Capability ticks get added after prose was drafted around a different story. Then the reconciliation work begins, and it is always bigger than the original work.
- Do this instead. Work in information order, the backwards chain from chapter 1. The evidence record is finished, named and linked before anything references it, so every later screen agrees with it by construction.
Start a join document today: one simple table, paper or spreadsheet, with a row per evidence item and columns for its name, its portal link, the capabilities you plan to tick, the pillar or pillars it serves, and where in the narrative you expect to cite it. Ten minutes per item. This document is the map the portal never gives you, and it makes every later chapter a fill-in exercise instead of an act of memory.
Sam Archer came into this chapter asking where anything lives. He now has a map of the screens, one worked journey he can copy eighteen times, and the start of his join document. His next worry is the obvious one: all right, but which of my own documents actually count?
- you can say, for any portal screen, what it collects and which later screen reads it;
- you can recite the journey of E7 without looking;
- your join document exists with its first row filled in, even if the item is a placeholder.